Category Archives: SSIS Tasks

This category contains descriptions\ problems\ solutions specific to SSIS tasks

Implementing timer in SSIS: Auto Stop Jobs

One can easily schedule job to run Daily\ Weekly\ Monthly but if you are asked to stop your job without any manual intervention at a particular time in a day because there are other planned activities that needs the server resources and this happens daily, what would you do? I was asked the same and hence I built small logic to implement the same which I am going to share with you.

Let’s begin:

I just introduced an ‘Execute SQL Task’ in my SSIS package and written following SQL Script:

WHILE (1=1)

BEGIN

IF(RIGHT(RIGHT(GETDATE(),12),6) = ‘2:29PM’)

EXEC msdb.dbo.sp_stop_job  N'<<Your job Name>>’ ;

END


That’s all I did and accomplished my task.

Enjoy!

Happy Coding!

Using Script Task

While developing an ETL solution, the developer may be required to write some .net code to perform some functions\ operations that are not supported by built in connection types. These operations may include:

  • Interacting with Active Directory to fetch user information
  • Interacting with file system
  • Creating performance counters

To perform all such above mention functions, we need some editor where we can write our .net code. Script task provides us with such capability wherein we can write .net code and can read\ write SSIS variables (both system and user defined). SQL Server 2012 has introduced the concept of ‘parameters’. These parameters can also be accessed within Script task like variables.

In the following example, I wanted to check if the text file exists in the directory. There can be many other ways to perform this task but here I will make use of Script task. Also I will show you how to access SSIS parameters\ variables in Script task.

The flow of execution will go as: I will pass the directory path to script task via parameters. Script task will read that path and check if the text file exist. I the file exists then script task will return full path of the file including filename to SSIS otherwise it will return 0. This return value will be captured in a variable to perform further processing if required.

Let’s begin with the example:

  1. Go to parameter tab in SSIS and create a parameter as:

Untitled0

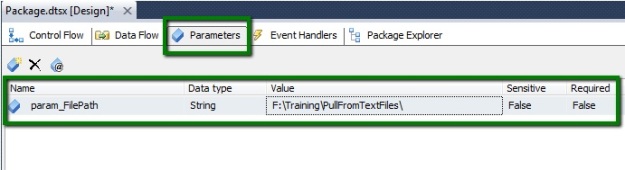
This parameter contains the directory path where my text file is located.

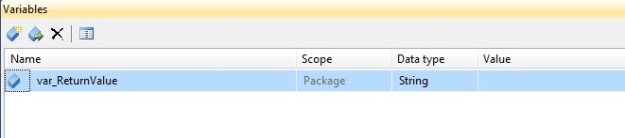
2. Create a variable that will contain the value returned by the script task as:

Untitled2

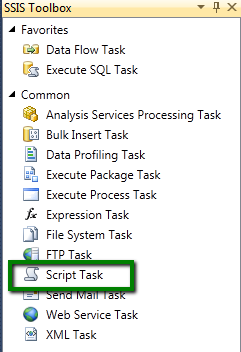
3. Drag the script task from the SSIS toolbox to Control flow window:

Untitled1

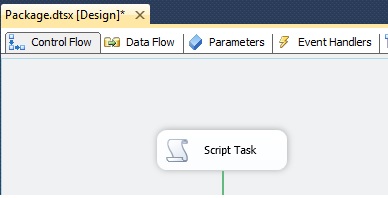
Control flow will look like:

Untitled3

4. Double click the script task to open Script task editor as:

Untitled4

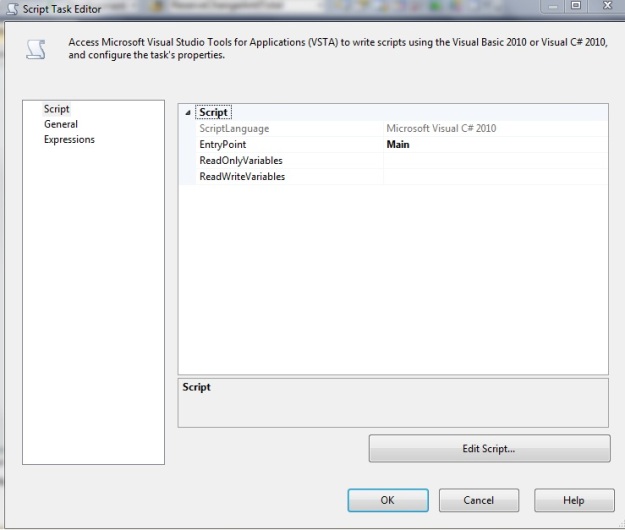
ReadOnlyVariables: contain variables\ parameters that the Script task can read but cannot modify. Those variables that we don’t want the script task to modify are kept in this section.

ReadWriteVariables: contain variables that script task can read as well as can modify the variables and return it to SSIS.

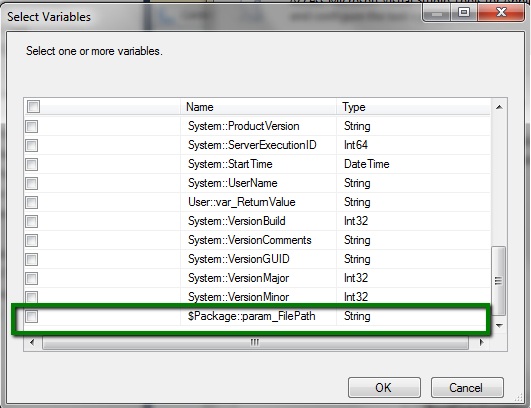
5. Click  the ellipses next to ‘ReadOnlyVariables’:

Untitled5

Next, select the parameter that we want to pass to Script task by checking the box:

Untitled6

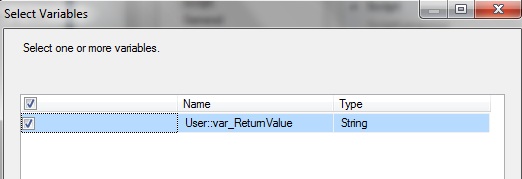
Similarly click the check box next to ReadWriteVariables and select the variable:

Untitled7

After performing above steps, Script task editor will look like:

Untitled8

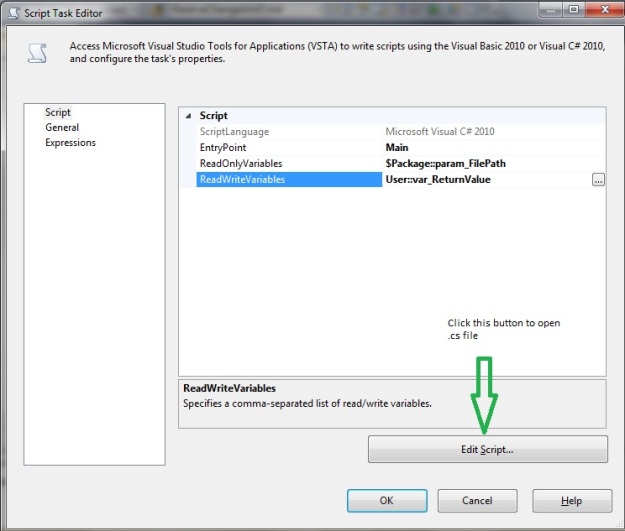
Click the editor as shown in above screenshot to open .cs file.

6. Once the .cs file opens up, type the following code in Main function:

string filepath = Dts.Variables[“$Package::param_FilePath”].Value.ToString();

if(String.IsNullOrEmpty(Directory.GetFiles(filepath,”*.txt”).FirstOrDefault()))

{

Dts.Variables[“User::var_ReturnValue”].Value = “0”;

}

else

{

Dts.Variables[“User::var_ReturnValue”].Value = Directory.GetFiles(filepath, “*.txt”).FirstOrDefault();

}

Dts.TaskResult = (int)ScriptResults.Success;

Note the use of parameters and variables in Script task. Using ‘DTS.Variables’, we can read\ write SSIS variables\ parameters. Also, variable\ parameter names are Case Sensitive. Be careful while using variable\ parameter names.

7. Now save the file and build the script. After the Build succeed, close the file. You will land on the Script task editor. Click OK and the job is done.

8. Since you have the script task output in variable ‘var_ReturnValue’, as per requirements you can decide how to use it.

Happy Coding!!

Using Data Profiling Task

Sometimes, you may need to review the data source before initiating processing of the data from that source. You may want to review the source for NULL values in columns, distinct rows etc. This initial analysis of data before processing it may help the developers in building the logic based on that data. To perform such an analysis, Data Profiling Task of SSIS can be used.

To use Data Profiling Task, drag the same from SSIS Tool Box to the Control flow. Double click the task and following window will be displayed:

Untitled

Click the drop down ,create a new File connection as shown below and Click Ok:

Untitled4

Now, since the destination connections are set, we will proceed to set the Requests.

Note: Requests indicate the different ways in which we want to analyze source.

Click the “Quick Profile” button shown in below image:

Untitled1

Configure settings as shown in below figure:

Untitled2

Now click Ok and a dialogue box will open showing the requests selected for analyzing data. Refer figure below:

Untitled3

Now run the Task. Once the execution is completed go to Data Profiler Viewer in Windows or double click the Data Profiling Task and open Data Profiler Viewer as shown:

Untitled5

After clicking the button, following window will open, Click Open as shown in below screenshot:

Untitled7

Browse to the location of XML file as specified in Destination of Data Profile Task. Click OK and following window will open:

Untitled6

Now select any of the options pointed in above figure and fetch the source information.

Like the page http://www.facebook.com/pages/SSISBlog/200678990060457  if the blog helps you in any aspect

Happy Coding!! Cheers!

Using File System Task

Sometimes, we need to copy files from one drive to another. One approach is you can perform a manual copy-paste. Now since it is not automated and in future you may need to do same task, it will kill your time. Other approach is to use a File System Task and develop a small ETL package to perform File Transfer.

Let’s proceed with a simple example. Create\ Populate a table in SQL Server using following script:

–Creating a table


CREATE TABLE [FileInfoTable]

(

[Source] varchar(50),

[FileName] varchar(20),

[Destination] varchar(50),

)


–Populating a table

INSERT INTO [FileInfoTable]

VALUES

(‘F:\S66\SOURCE’,’DG.txt’,’F:\D67′),

(‘F:\S66\SOURCE’,’HR.txt’,’F:\D67′),

(‘F:\S66\SOURCE’,’AB.txt’,’F:\D67′),

(‘F:\S66\SOURCE’,’DG.txt’,’F:\D68′),

(‘F:\S66\SOURCE’,’HR.txt’,’F:\D68′),

(‘F:\S66\SOURCE’,’AB.txt’,’F:\D68′),

(‘F:\S67\SOURCE’,’DG.txt’,’F:\D69′),

(‘F:\S67\SOURCE’,’HR.txt’,’F:\D69′),

(‘F:\S67\SOURCE’,’AB.txt’,’F:\D69′)


Create 2 folders in the F drive S66 and S77 and create some text files say DG.txt, HR.txt, AB.txt. This is just an example; you can create folders in any drive and have different files in it. Be sure to populate the table with the proper file paths.

Similarly create destinations where you want to dump these files. In my case, I have created 3 folders D67, D68, D69 under F: drive

Building SSIS package:

Below is the screenshot of SSIS package:

Untitled1

‘GetFileInfoTable’ will fetch the records from table created previously, store it in an Object and provide the same to For Each Loop Container via Object in the format below:

SourceName Destination
F:\S66\SOURCE\DG.txt F:\D67
F:\S66\SOURCE\HR.txt F:\D67
F:\S66\SOURCE\AB.txt F:\D67
F:\S66\SOURCE\DG.txt F:\D68
F:\S66\SOURCE\HR.txt F:\D68
F:\S66\SOURCE\AB.txt F:\D68
F:\S67\SOURCE\DG.txt F:\D69
F:\S67\SOURCE\HR.txt F:\D69
F:\S67\SOURCE\AB.txt F:\D69

One by one these records will be fetched by For Each Loop (stored in 2 SSIS variables SourceName and DestinationName) and be passed to File System Task.

Note: For passing an Object and configuring For Each Loop container please see https://ssisblog.wordpress.com/2013/03/06/working-with-loops-in-ssis/

Double click the FileSystemTask and set the properties as:

Untitled2

Run the package and check the destination. The files will be copied to the destination.


Leave a comment if it is helping you in any aspect.

Cheers! Happy Coding!!

Working with Loops in SSIS

I have observed one peculiar issue while pulling data from source in one shot i.e. SSIS throws “Connection time out” error after pulling ~80% of the total records. To rectify this issue, I started pulling data in chunks. There, I made use of “For loop Container” which I am going to explain below:

Let’s say I need to pull data on the basis of ColSID (assuming ColSID is the name of integer column) and I have 100 records in source. This is just an example but in real time you may millions of records. For Loop Container shall accept the format as:

ColSIDStartRange ColSIDEndRange
1 20
21 40
41 60
61 80
81 100

Now, you have to write some logic and divide the ColSID column in a format acceptable by For Loop Container i.e. format similar to above mentioned table.

Note: For dividing the ColSID into table format please refer ‘SQL Helper’ section in my blog.

Below screenshot depicts the sample flow of execution:

Untitled1

Set SQL Task properties:

Double click SQL Task and set the properties as shown in below screenshot:

Untitled3

Go to Result Set and select the Range Variable name and set it as:

Untitled4


Now, since you have the format available, you will pass this format to For Loop container by selecting few properties as:

Untitled2

Note: The variable in which you are storing the Range should be of OBJECT Type. In our case it is ColSIDRange

Click ‘Variable Mappings’ and set the variables as shown in below screenshot:

Untitled5

Note: ColSIDStart and ColSIDEnd are integer variables.

Now double click the DFT task inside For Loop Container and set the properties as:

Untitled6


Now click the ‘Parameters’ tab and select parameters as:

Untitled7


Click OK and everything is set for you.

Map the source columns with your destination and start pulling the data.


Leave a comment if you like the blog and if it is helping you in any respect.

Happy Coding Cheers!!


Peculiar behavior of Merge Join Transformation

Hi guys

We have been using Merge join transformation to merge the data from two different sources. I would like to tell you few points that needs to be taken care of while using merge transformations:

  • We know that for merge transformations, the two inputs needs to be sorted. For that, we set IsSortProperty of the source to True and set SortKeyPosition of the input column as well on which we want to sort the data. However, this configuration does not suffice the Sort criteria. Merge join actually needs the data itself to be sorted. So do remember to add ‘Order By‘ clause in your source query
  • If you have an Identity column in your destination, then make sure the data type of the column is ‘int‘ not ‘bigint’. If the data type of the Identity column is bigint, then merge join will fail.

Enjoy guys!!

Happy Coding!!

SSIS – Execute Process Task (Getting rid of xp_cmdshell)

Running a batch file through SSIS??

Most of us have been running commands on command prompt using SQL Server. And we know for these commands to run from SQL Server, we need to enable xp_cmdshell option of SQL Server.
Did we ever wonder why xp_cmdshell is disabled by default? I guess majority will say no.
There is a security issue attached with xp_cmdshell.
May be in your production environment, you cannot enable this option. Then what will you do? How will you run such commands?
Well, through SSIS you can achieve this task. You can write all your commands in a batch file and execute this batch file from ‘Execute Process Task’.
Now you don’t need to enable xp_cmdshell

Enjoy!!